
Beta updates were formerly restricted to iPads, iPhones, and Macbooks. Apple has recently introduced similar updates to Airpods Pro. It comes with some new features, and among them, spatial audio for facetime calls and ambient noise cancellation, are to name a few. Now there is a method that Apple has released; it is a set of instructions on how to install this beta software for your AirPods Pro. But you need to know about some other important stuff to follow that method. And here is a step-by-step tutorial on how to install the beta firmware for your AirPods pro. So, let’s begin to know How to Install Apple’s Beta Firmware on AirPods Pro without any further delay!
First off, you’ll need to have a registered developer account because you can’t install this from a third-party unofficial source. If you do, then there are some other complications which we are sure you don’t want to get into!
If you have already downloaded the iOS 15 developer beta, this tutorial is very similar to that one!
How to Install Apple’s Beta Firmware on AirPods Pro
Also Read: Apple is Reportedly Working on NEW IOS Features!
First Step
Open Apple’s developer site on your iPhone and then go to the Downloads section.
Second Step
Now fill in your login information. Once logged in, you’ll see a “Drop-Down” icon beside the Downloads section. Click on that.

Third Step
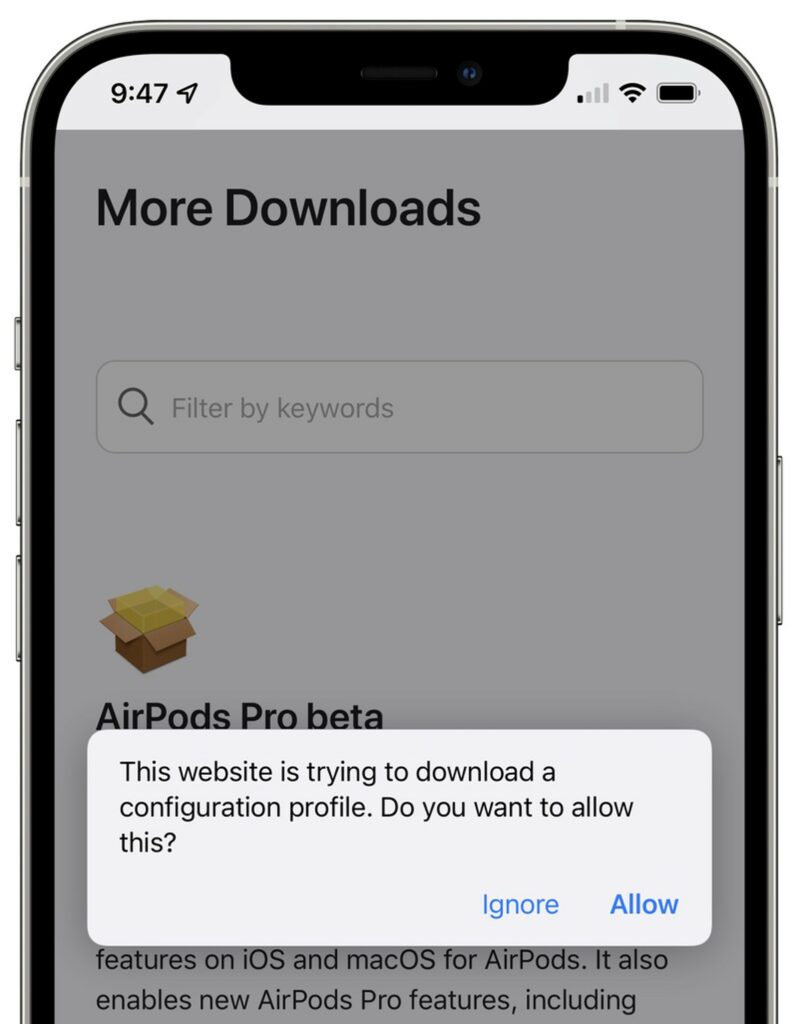
Tap on the “Airpods Pro Beta” section and then click on the “View Details” button.
Fourth Step:
You’ll see a profile named “iOSAirPodsProSeed.mobileconfig”, click on it and then allow the software to get installed.
Fifth Step
On your iPhone, go to the Settings app. Now, click on the “Profile Downloaded” option. Choose the install option so that the profile can get installed onto your device. It will then ask for your phone’s code just for the sake of authentication. So, enter the phone’s code.
Sixth Step
Tap on the “Install” button again. Once you have completed all 6 steps, click on “Done” to finish the entire process!
How to enable AirPods Pro Beta updates through Xcode?
Before following this process, you must be having the latest Xcode beta (Xcode 13 Beta 3). Without it, you won’t be able to commence.
The previous six steps were for downloading the Beta profile onto your iPhone, but the following steps will help you install the actual Beta Update. The steps are very different!

Step 1
It is crucial to attach your AirPods to your iPhone and once that is done, connect your iPhone to your MacBook.
Step 2
Now on your MacBook, launch the Beta App. Just click on it, and your work will be done!
Step 3
Now open the Settings app on your iPhone and go to the Developers section.
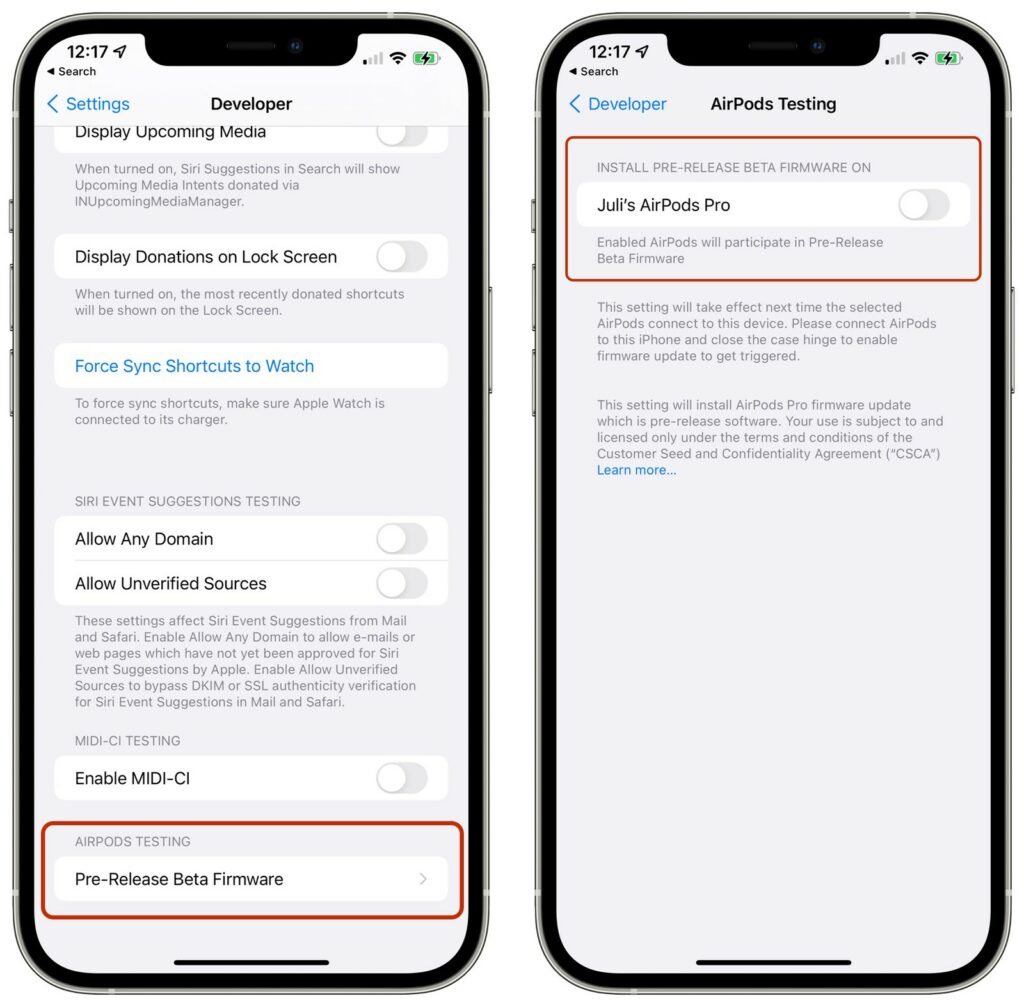
Step 4
Scroll down in the Developers Section until you reach the “Pre-Release Beta Firmware” button.
Step 5
Once you spot your paired AirPods, tap the “Toggle” button next to it. This will enable the Beta software on your AirPods. One last step is to click on the “Agree” button, and once you tap on it, you’ll agree to Apple’s terms and conditions.
Tips for downloading the Beta Software on your AirPods
This process can take a lot of time. So, to boost it, make sure that your AirPods are 100% charged before connecting them to your iPhone. It is advisable to do this at night time!
What’s new in this Beta Update?
Apple has included support for special audio in Facetime, so you can use that technology inside your Facetime call to make your calls sound even better than before.
The Left and Right Stereo technology inside both AirPods is introduced to basically make the sound so much better than the voices will get spread out. As a result, it will seem like the sound is coming from different directions.
We hope that this article made it easier for you to download the Beta Software. If you have any other queries, let us know!